1-wire sensors are really handy to work with. They require just power and ground and then use a single wire to transmit and receive data. They can be wired in parallel to create a network of sensors - and the wire can be quite long (>100m), depending on the cable, drive and termination. Each 1-wire device has a unique address from the factory. History and more details can be found on wikipedia: 1-wire.
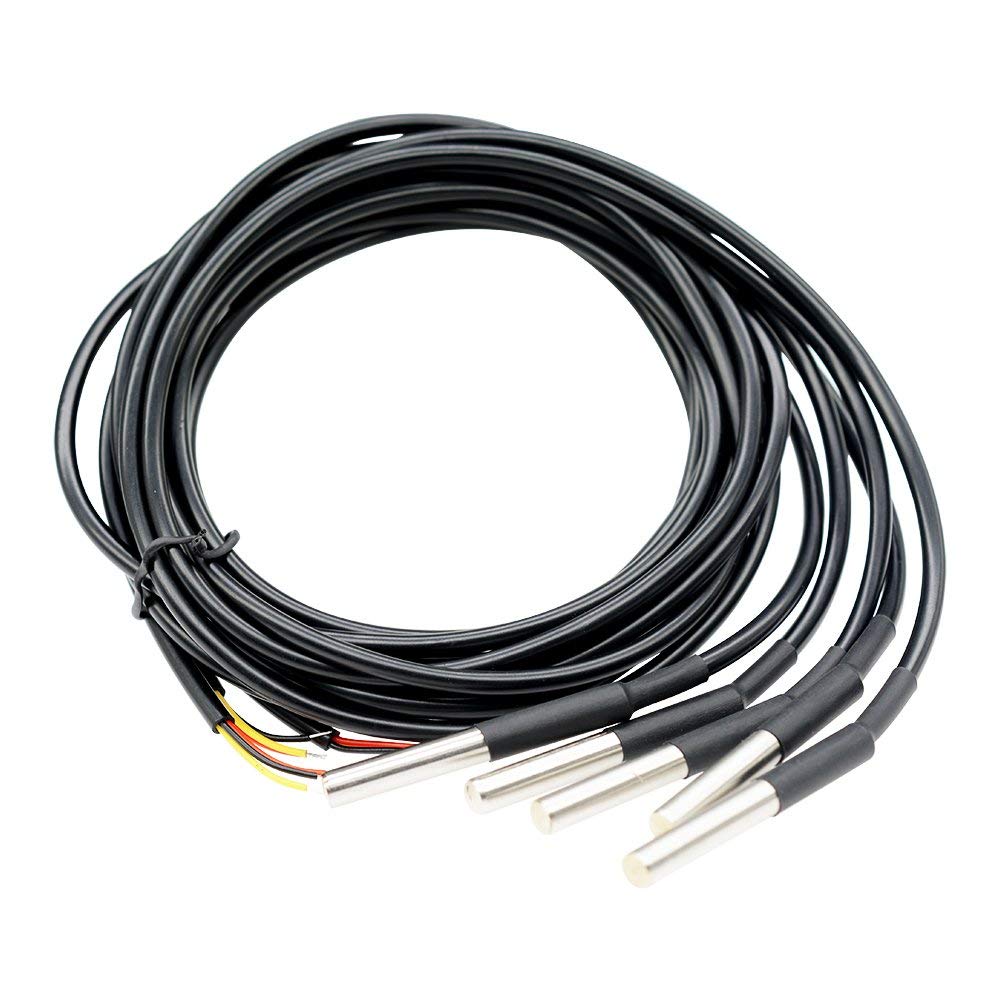
One of my favorite sensors is the DS18B20, a temperature sensor. They can be purchased in a ready to use form including the cable assembly (DS18B20 with cable):
If you would like to build your own, the sensor component can also be purchased alone: DS18B20 component.
Here is an excellent write up from The Pi Hut, Sensors - Temperature with the 1-Wire interface and the DS18B20 that provides instructions on getting 1-wire running and tested (I do recommend instead of the first 3 commands in the article below and editing of a system file, you run raspi-config to enable the one-wire interface. Run $sudo raspi-config, select Interfacing Options->1-Wire enable. This will automatically update the boot file and reboot). Once you are done with the steps in the article, we will modify the Python code and set it up as a plug in for JEDI One (see footnote for complete source code):
Now change these lines in the Python code:
 return temp_c, temp_f

# Print out the temperature until the program is stopped.
while True:
 print(read_temp())
 time.sleep(1)
To these lines instead:
 return temp_f

devID = "DS18B20"

#New print statement that has Jedi tags

print("metric:id=%s,n=Temperature,vd=%0.2f,u=F" % (devID, read_temp()))
Also add a line at the top of the code (very important):
#!/usr/bin/python3
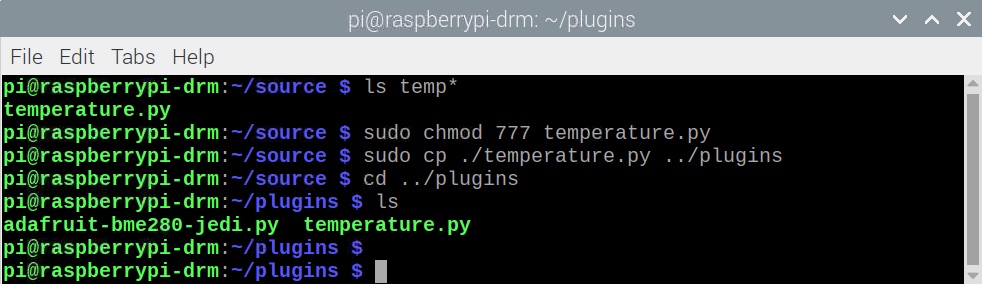
Save the file, make it executable, and move it to the plugins directory where JEDI One is installed.
Here's a video showing how to add this new plugin as a data collector and then create a dashboard with it:
Footnote: Here is the modified code in it's entirety, for easy cut and paste:
#!/usr/bin/python3

# Import Libraries
import os
import glob
import time

# Initialize the GPIO Pins
os.system('modprobe w1-gpio') # Turns on the GPIO module
os.system('modprobe w1-therm') # Turns on the Temperature module

# Finds the correct device file that holds the temperature data
base_dir = '/sys/bus/w1/devices/'
device_folder = glob.glob(base_dir + '28*')[0]
device_file = device_folder + '/w1_slave'

# A function that reads the sensors data
def read_temp_raw():
    f = open(device_file, 'r') # Opens the temperature device file
    lines = f.readlines() # Returns the text
    f.close()
    return lines

# Convert the value of the sensor into a temperature
def read_temp():
    lines = read_temp_raw() # Read the temperature 'device file'

# While the first line does not contain 'YES', wait for 0.2s
# and then read the device file again.
    while lines[0].strip()[-3:] != 'YES':
        time.sleep(0.2)
        lines = read_temp_raw()

# Look for the position of the '=' in the second line of the
# device file.
    equals_pos = lines[1].find('t=')

# If the '=' is found, convert the rest of the line after the
# '=' into degrees Celsius, then degrees Fahrenheit
    if equals_pos != -1:
        temp_string = lines[1][equals_pos+2:]
        temp_c = float(temp_string) / 1000.0
        temp_f = temp_c * 9.0 / 5.0 + 32.0
        return temp_f

devID = "DS18B20"

#New print statement that has Jedi tags

print("metric:id=%s,n=Temperature,vd=%0.2f,u=F" % (devID, read_temp()))